Page 1 of 3
Bending Form Spreader Rods question
Posted: Mon Nov 02, 2015 2:33 pm
by GlennH
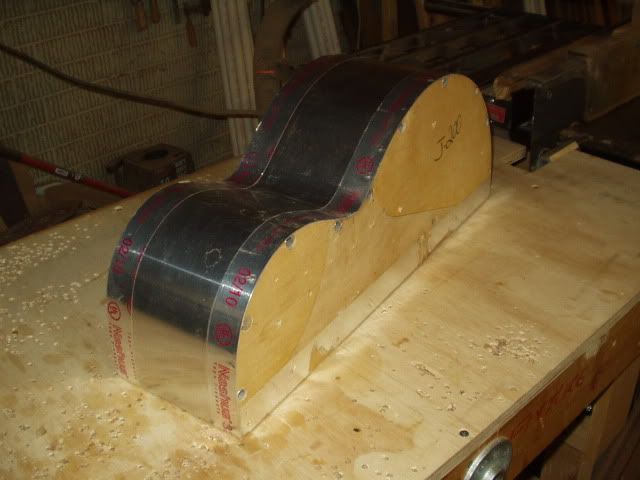
I noticed that the Fox style side bender variants usually have aluminum spreader rods to space the sides of the bender form. Aside from their obvious structural function, is there any other purpose served by these which requires them to be aluminum rods? It seems needlessly complicated.
I'm envisioning a form with simple 1" x 1" wooden spreaders let into the sides in place of the aluminum rods. I might use a light aluminum perforated grille material to cover the bending area to allow heat transfer and provide a little extra stability.
Good idea? Bad?
Re: Bending Form Spreader Rods question
Posted: Mon Nov 02, 2015 3:21 pm
by Bobby M
If you are using light bulbs instead of a blanket and controller you would want to wrap the wooden spacers with reflective material so as not to burn them up. A few years ago when I built a fox style bender I too thought the aluminum rods to be excessively difficult due to getting the ends of them flush with the top of the form. I purchased a piece of flat bar stock, cut it to the correct lengths on the bandsaw and then cut notches into the sides of the form to epoxy them into. Had to dig a little bit but found a decent pic in an archive that shows what I'm talking about:
luthiersforum.com/forum/download/file.php?id
Re: Bending Form Spreader Rods question
Posted: Mon Nov 02, 2015 3:25 pm
by GlennH
Glad I asked the question.
I am intending to apply heat to both sides, using light bulbs below and a heating blanket on top. Your answer makes perfect sense to me. As a matter of fact, I have some aluminum bar stock hanging around somewhere. This would be even simpler to build than using wooden spacers.
Thanks!
Re: Bending Form Spreader Rods question
Posted: Mon Nov 02, 2015 7:19 pm
by ken cierp
The inside of an internally heated bending form "must" be covered with metallic material -- or you will start a fire. All our production benders are internal heat style (600 watts) -- we pre-bend the waist curve like the factories this procedure was a quantum improvement which virtually eliminated spring back --- try it you'll like it. Here's one of our forms -- we do use a top slat for restrictive compression, but we do not have to mess around with a sandwich system.
Fully enclosing the form takes the bulb heated bender to the next level by eliminating the hassle of aligning the three layer "slats-wood-slat" sandwich. But more importantly the heat is captured and the bender is then much like the "factory" benders providing even heat to the inside curves. The skin is made of .023" aluminium available at the big box home improvement store. Pre-drill holes and use #18 brads, cover the brads to reduce the chance of rust stains -- the furnace tape is also available at Lowe's and HDepot
Re: Bending Form Spreader Rods question
Posted: Mon Nov 02, 2015 7:30 pm
by John J
I made my molds covered like Ken's suggestion. half inch aluminum rods and everything covered on the inside with foil tape. My set up uses light bulbs only with no external blanket. i pre-bend the waist, I spritz down the wood, wrap in parchment paper and top with an aluminum slat. So far I've bent maple, walnut and koa very nicely.
Re: Bending Form Spreader Rods question
Posted: Mon Feb 29, 2016 2:28 pm
by johnnyg
I am currently building a light bulb heated bender. The information here is really helpful. One thing I am curious about is pre-bending the waist. How is this being done? Are you using a pipe bender?
I have seen some pictures of forms where the rods seem to not be flush with the top. This makes me question where they should go.
If there are some detailed form construction details someone can point me to, I would greatly appreciated it.
Thanks!
Re: Bending Form Spreader Rods question
Posted: Mon Feb 29, 2016 2:47 pm
by ken cierp
Here's our production waist curve bender:
viewtopic.php?f=8&t=794
The "support rods" should be spaced logically, they are there to make sure the aluminum skin does not deflect. Whether skin or slats the object is to have a rigid backer to support the side material during compression and or stretching caused by the process.
To accomplish the above required criteria, holes are drilled with the tangents landing exactly on the profile out line. Easy to do using a drill press, set the drill against a small stop block and work the pair of form sides against the block and work around the profile.