continuing build thread for Gore Medium body SS

Show us how your current project is progressing
John Parchem
Posts: 2757
Joined: Fri Dec 23, 2011 8:33 pm
Location: Seattle
Contact:

Re: continuing build thread for Gore Medium body SS

Post by John Parchem » Thu Jul 03, 2014 1:28 pm

I am still a few days away from being able to do a final sanding and buffing of this guitar. I am really getting impatient so I roughed out a nut, checked that my geometry is still correct. I was really pleased how the Em6000 sprayed on. I had each coat around 3 to 4 mill wet. I leveled the top at 6 coats and the back and sides at eight coats and went over the guitar and drop filled any voids I could find around the bindings or rosette. No matter how much time I think I have spent finding them before spraying I always seem to find a few when I have 4-8 coats on the guitar.

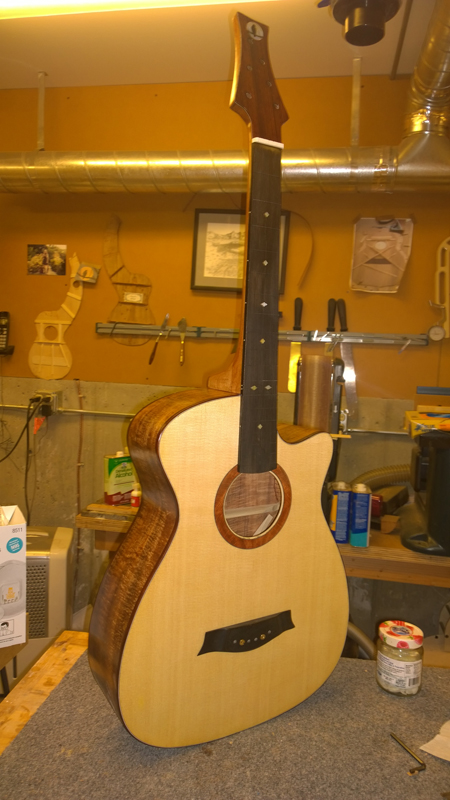
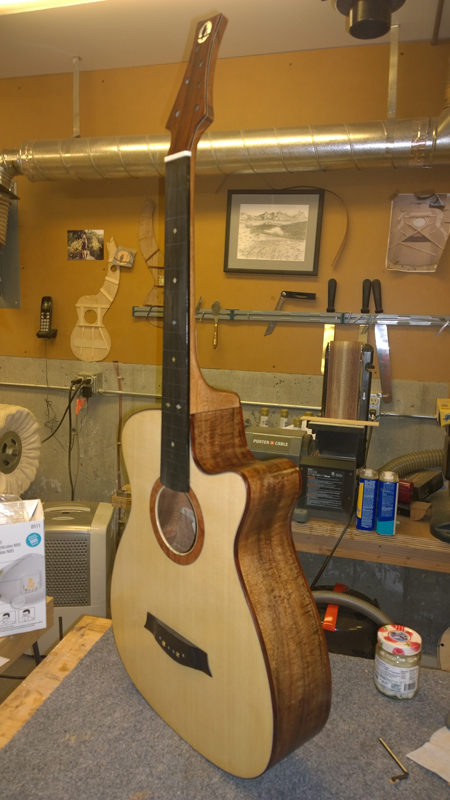
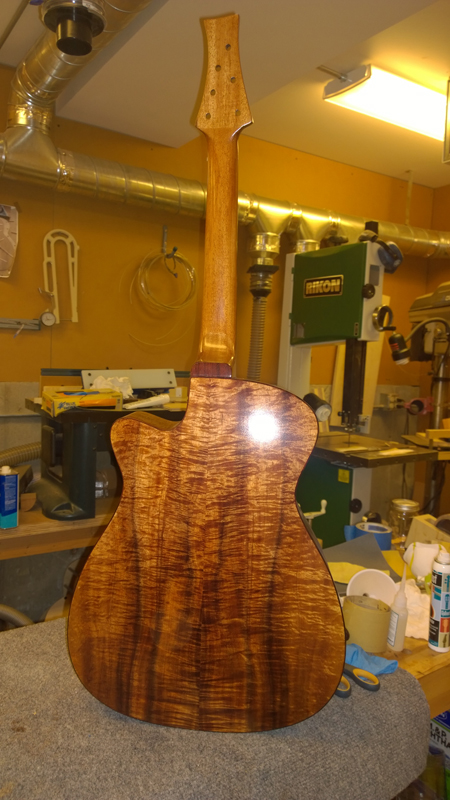
I sprayed 6 more coats on the back and sides and lightly sanded away any nubs, at this point the finish was very level and with 3 mill wet coats there are no drips or sags. Em6000 also levels nicely at that thickness.

I followed with 2 more final coats on the entire body for a total of 16 on the back and sides and 8 on the top.

Image

Image

Image

Image

Image

Herman
Posts: 1720
Joined: Sun Dec 30, 2012 1:20 pm
Location: Arnhem area, the Netherlands
Contact:

Re: continuing build thread for Gore Medium body SS

Post by Herman » Thu Jul 03, 2014 1:42 pm

Getting exited? I guess everyone here wants to know how this beauty will sound. me too.
Herman

Kevin in California
Posts: 2834
Joined: Mon Dec 19, 2011 4:19 pm

Re: continuing build thread for Gore Medium body SS

Post by Kevin in California » Thu Jul 03, 2014 4:29 pm

It is looking yummy!

John Parchem
Posts: 2757
Joined: Fri Dec 23, 2011 8:33 pm
Location: Seattle
Contact:

Re: continuing build thread for Gore Medium body SS

Post by John Parchem » Sun Jul 06, 2014 9:48 pm

I waited about five days for the finish to cure, so I started the end process. I mostly level sanded the top. It was very close. I also checked the bridge alignment and center one last time before preparing to glue on the bridge. Drilling the bridge holes before even bracing the top demands attention at many points in the build process to make sure they are in the correct place. To give myself a little leeway I will route the bridge slot after everything is together.

Image

I finish now with no tape. I need to clean the finish line anyway so I decided a few guitars ago to spray with no tape for the bridge. So I used some handy stewmac hollow bolts to blot on the bridge to hold it in place while I traced the bridge outline with a scalpel. I used a razor blade and a chisel to remove the finish. I use the razor blade to clean the inside of finish almost to the edge. Then I use a very sharp chisel to lift the remaining finish to the cut line I made with the scalpel.

Image

Image

I used a vacuum clamp to glue the bridge in place. I made a nice caul for the curved braces when I made the top, but I could not find it. I am a little gun shy of the vacuum clamp as it marred a FP finish on my last classical. Luckily no problem this time.

Image

I normally wait to glue on the neck and fret board extension before I fret the guitar. But this is a bolt on bolt off neck! SO I bolted it up properly, did my final leveling ; bolted in place (and it needed it) Removed the neck and fretted the neck. What a joy to dress the frets off of the guitar! Also pictured is my favorite odd ball stewmac tool. The Japanese fret slot saw is a wonder if you get glue in the slots. Really easy when binding the fret board. The ends of the saw have a oddly jutting tooth that allows one to walk ones way toward the binding steadily removing cured CA.

Image

Image

So close!!! But if I go on I know I will muck up the saddle slot.

Image

Image

Image

Oh by the way the final tap spectrum, My target was 95,180, 226. The was for the air, top and back resonances. My back is 3 semitones, where 4 was my target. To fix I need to add a bit of wood to the scallop I made to the bottom back brace. (I went a little deeper than the book suggested :( . I will string the guitar up first though to see what it sounds like. All of the resonances are between scale notes so all and all this should be a good guitar.

Image

Kevin in California
Posts: 2834
Joined: Mon Dec 19, 2011 4:19 pm

Re: continuing build thread for Gore Medium body SS

Post by Kevin in California » Mon Jul 07, 2014 1:02 am

It is coming together so nicely. A Most unique design to.
A great project.

Tj Turner
Posts: 89
Joined: Wed Jan 25, 2012 8:37 pm

Re: continuing build thread for Gore Medium body SS

Post by Tj Turner » Mon Jul 21, 2014 10:07 pm

John...

It looks awesome. Great job. I have Trevor's books too, and I've been slowly going through them (very slowly at times).

I always had one question, but never saw it answered in the books. When you lay down the carbon before putting down the brace, does it provide a good flat surface for the brace to glue to? It seemed to me reading the book that once you pulled out the individual fibers and put them down on the surface, that you could then have gaps around the fibers that the brace had to adhere to, therefore leaving a less than desirable glue joint. How did you overcome that, or how did it work in your experience?

Thanks!
Tj Turner
Author, Scientist, bumbling Luthier
Author of Lincoln's Bodyguard
www.tjturnerauthor.com

John Link
Posts: 800
Joined: Tue Nov 27, 2012 8:01 pm
Location: Kalamazoo, MI

Re: continuing build thread for Gore Medium body SS

Post by John Link » Mon Jul 21, 2014 11:13 pm

I second Ty's question. The fibers on top don't matter, but the ones in between look like they would be hard to keep flat.
John

Post Reply