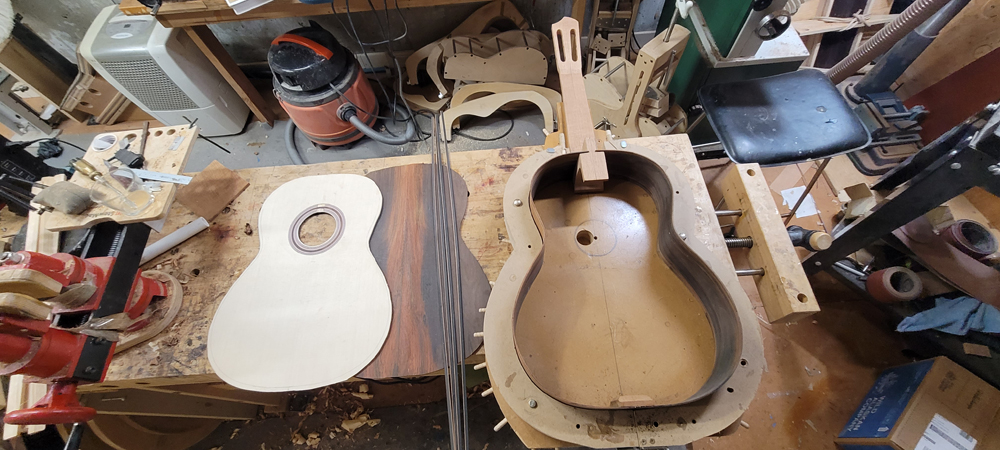
Starting a new BRW falcate braced falcate classical guitar

Show us how your current project is progressing
John Parchem
Posts: 2746
Joined: Fri Dec 23, 2011 8:33 pm
Location: Seattle
Contact:

Re: Starting a new BRW falcate braced falcate classical guitar

Post by John Parchem » Tue Dec 12, 2023 8:27 pm

With the plates thicknessed and profiled and the neck rough carved and rims bent I turned my attention to the plates.

Image

I use the back bracing plan from the plans in the Gore/Gilet Contemporary Acoustic Design and Build books. First step I planed some sitka brace stock to the correct height and then ripped in my bandsaw and thicknessed sanded in my belt sander a bunch back braces.

Image

Image

Image

I put a gabled house shape on the braces using a homemade jig and my router table with a 27.5° bit installed

Image

The properly sized brace stock is screwed on the jig, a pass is made on one side and then the brace is flipped and a pass is made on the other side.


Image

Image

Falcate braces are curved spruce braces. To allow the curves each brace is a lamination of three 1.7 mm strips. I use epoxy for the laminations.

I used a bandsaw to rip the laminates a bit thick. I like to get two braces from each of the laminations. I need relatively tall brace stock as on my classical guitars the braces are as tall as 10.5 mm so with a kerf accounted I need brace wood about 25 mm tall.

Image

Thickness to 1.7 mm.
Image

Spruce is stiff so I first heat bend to shape.

Image

Image

With three laminates bent, I clamped them in my mold and let them rest over night.

Image

I also bent the three laminates for the secondary falcate braces.

Image

The next morning using a combination of a band clamp and a few cam clamps I laminated the braces.

Image

Image

Image

John Parchem
Posts: 2746
Joined: Fri Dec 23, 2011 8:33 pm
Location: Seattle
Contact:

Re: Starting a new BRW falcate braced falcate classical guitar

Post by John Parchem » Wed Dec 13, 2023 7:17 pm

The back braces are rather straight forward, spruce with titebond original.

First step is gluing on a cross grain 2 mm thick spruce strip. I line up a ruler as a guide, glue and clamp. I use a wet rag for the squeeze out. I use the 10ft radius disk as the caul. Mainly as it is need when I glue the braces.

Image

I use a scalpel to mark and cut where the braces will cross the center strip. Not shown, I use a chisel to clear.

Image

With the braces inlet and sized I use a combination of a plane and a 10 ft radius sanding board to radius each of the braces.


Image

Image

I wee bit of carving. I use a plexiglass guard to both thickness the brace ends and protect the back.

Image

Image

Image


Then one by one (I was too lazy to make enough gluing cauls for the triangular braces to do them all at once.


Image

Image

Image

As they were short I did glue all the radial braces at once!

Image

John Parchem
Posts: 2746
Joined: Fri Dec 23, 2011 8:33 pm
Location: Seattle
Contact:

Re: Starting a new BRW falcate braced falcate classical guitar

Post by John Parchem » Wed Dec 13, 2023 8:10 pm

To the mess! I ripped the falcate brace laminates in half and then routed a few thousands inch channel to help keep carbon fiber tow from squeezing out when I am gluing the braces down.

Image

Image

Image

If life was not hard enough on this guitar I decided I wanted a CF reinforced bridge patch. This is a first for me. I had two thoughts. The first was to simplify the layup for the bridge blank. With the CF on the top under a plate I can layup up the bridge blank with only on sheet of CF, like Trevor does with his steel string guitars. As you will see the bridge patch will complicate gluing down the falcate braces. The plate if a tad over 1 mm spruce cross grain to the top.

Image

Image

I use West system epoxy

Image

Image

Image

I marked out the recesses in the braces for the plate and cut by hand. My normal trick with fans of putting the brace in a vice at the right height does not work with a curved brace.

Image

Image

Image

Image

It is always a mess gluing these in. I first wet the carbon fiber tow with epoxy, I paint the brace path on the top with epoxy, paint the brace with epoxy I lay the tow in the channel in the brace bottom and carefully place each brace. Not lot of pictures as my hand are wet with epoxy in progress.

Image

I cut placed the remaining braces. I decided to inlet the small cross braces into the patch such the I catch the bridge.

Image

Image

Here use see the wetted CF tow on the top painted with epoxy.

Image

All glued to the top.

Image

All of the braces will be toped with carbon fiber tow but first I use small planes and chisels to shape the braces.

Image

The last brace is the upper transverse brace. I laid out the bridge and marked where it crossed the falcate and sound hole braces. Once marked I cat with a razor saw and cleared with a chisel while in my parrot vice.


Image


Image

Image

Image

Image

Then glued in place with titebond.

Image

Shaped and fit to the rims.

Image

John Parchem
Posts: 2746
Joined: Fri Dec 23, 2011 8:33 pm
Location: Seattle
Contact:

Re: Starting a new BRW falcate braced falcate classical guitar

Post by John Parchem » Wed Dec 13, 2023 8:36 pm

A few more tasks and I will be able to close the box.
First off I used a combination of a plane and a radius sanding disk to take the rims down to the spec size.

Image

Image

I used reverse kerfed linings for the top. I like to first bend with a bit of water on the outside of the rims to avoid breaking the linings when gluing them in place.

Image

Image

I went ahead and glued the neck to the top. At this stage it is really easy to line everything up to make sure the neck is straight on the center line.

Image

Image

I tried a new procedure for the back linings. I first marked out where the braces will be on the rims.

Image

Then I glued on segments of the linings leaving the area under the back braces open.

Image

Image

Once I sanded the back rims to clean up the linings I added filler block at the depth of the brace inlets.

Image

Image

Image

Amazingly the back fit!

Image

Kevin in California
Posts: 2799
Joined: Mon Dec 19, 2011 4:19 pm

Re: Starting a new BRW falcate braced falcate classical guitar

Post by Kevin in California » Thu Dec 14, 2023 11:30 pm

I like that idea for notching the kerfing, or rather not notching. I usually go through the sides with the braces buy I'm going to try that.

John
You've made a few of these flacated braces guitars.
What specifically do you like about this process? A challenge to make? Guitar sounds better?

John Parchem
Posts: 2746
Joined: Fri Dec 23, 2011 8:33 pm
Location: Seattle
Contact:

Re: Starting a new BRW falcate braced falcate classical guitar

Post by John Parchem » Fri Dec 15, 2023 11:27 am

Kevin in California wrote: Thu Dec 14, 2023 11:30 pm I like that idea for notching the kerfing, or rather not notching. I usually go through the sides with the braces buy I'm going to try that.

John
You've made a few of these flacated braces guitars.
What specifically do you like about this process? A challenge to make? Guitar sounds better?
my falcate classical guitar perform at a really high level, whereas my fan braced classicals fall in the mix of OK to good guitars. After a listening session at the Guild of American Luthiers conference I had a number of very well know classical guitar builder seek me out do to its performance. I have also build a number of falcate steel string guitars. They all have volume, sustain, dynamic range and balance across the strings. How ever I do still build some x-braced guitars as they sound good as well. I am not love with all the epoxy mess of this process. I still build my flamenco guitars with fan braces to get the flamenco sound.

I do not build more than a few instruments a year so the extra process is no big deal.

John Parchem
Posts: 2746
Joined: Fri Dec 23, 2011 8:33 pm
Location: Seattle
Contact:

Re: Starting a new BRW falcate braced falcate classical guitar

Post by John Parchem » Tue Dec 19, 2023 12:34 pm

With the top ands rims ready time to close this guitar up

Image

I glued the rims to the top on my solera with the external mold in place to keep the sides square and to the profile.

Image

Image

Image

I just let some CA wick in to the sides to neck joint. I used to use titebond but I once had trouble when the wood swelled while I was pushing the sides into the slots.

Image

Let the glue curve for a few hours pulled the assembly and trimmed the top with a flush cut bit.

Image

Image

Post Reply