
Yes, looking good John!
I've seen this process elsewhere -- I don't understand the veneer step. Why not just use the solid material of choice?
Martin 00 cutaway with arm bevel #12 so close
Re: Martin 00 12 Fret - cutaway with arm bevel #12
ken cierp
http://www.kennethmichaelguitars.com/
Store Front
http://www.cncguitarproducts.com/
KMG Guitar Kit Information
http://www.kennethmichaelguitars.com/ki ... ckage.html
http://www.kennethmichaelguitars.com/
Store Front
http://www.cncguitarproducts.com/
KMG Guitar Kit Information
http://www.kennethmichaelguitars.com/ki ... ckage.html
-
John Parchem
- Posts: 2749
- Joined: Fri Dec 23, 2011 8:33 pm
- Location: Seattle
- Contact:
Re: Martin 00 12 Fret - cutaway with arm bevel #12
Thanks,ken cierp wrote:Yes, looking good John!
I've seen this process elsewhere -- I don't understand the veneer step. Why not just use the solid material of choice?
I watched a Kent Everett DVD to get this process. From what I remember from Kent's explanation was that he was looking for a repeatable process that he could work into his build process that was quick but looked good. This process avoids any precision shaped components for the bevel thus it is fast to build. If I do a good job it should look like the binding and the veneer are one piece of wood forming what Kent calls a transitional bevel.
Re: Martin 00 12 Fret - cutaway with arm bevel #12
Okay I understand the reasoning now. Thanks for tha explanation.
Re: Martin 00 12 Fret - cutaway with arm bevel #12
Sorry not getting that? The substrate has to be shaped perfectly before applying the veneer anyway --right? So if I were to use this process I think I'd just use the material of choice and skip the veneering step and the worry/risk of a catastrophic sand through. $.02
ken cierp
http://www.kennethmichaelguitars.com/
Store Front
http://www.cncguitarproducts.com/
KMG Guitar Kit Information
http://www.kennethmichaelguitars.com/ki ... ckage.html
http://www.kennethmichaelguitars.com/
Store Front
http://www.cncguitarproducts.com/
KMG Guitar Kit Information
http://www.kennethmichaelguitars.com/ki ... ckage.html
-
John Parchem
- Posts: 2749
- Joined: Fri Dec 23, 2011 8:33 pm
- Location: Seattle
- Contact:
Re: Martin 00 12 Fret - cutaway with arm bevel #12
I could not use the right wood as a substrate as it would end up below the top and rims. I could see sanding the bevel back and applying a solid wood of choice and then hand cutting in the purfling channel between the bevel and the top and the rim if I have a side purfling.ken cierp wrote:Sorry not getting that? The substrate has to be shaped perfectly before applying the veneer anyway --right? So if I were to use this process I think I'd just use the material of choice and skip the veneering step and the worry/risk of a catastrophic sand through. $.02
I am not afraid of a sand through on the veneer as I will only finish sand the top of the veneer, I will end up with the edge of veneer showing, but that is OK as it is transitioning from the binding.
Here is a cross section of how the veneer will be applied. As it is hard to explain.
- Attachments
-
- bevel2.jpg (48.25 KiB) Viewed 1005 times
Re: Martin 00 12 Fret - cutaway with arm bevel #12
I am sure it will look great!
ken cierp
http://www.kennethmichaelguitars.com/
Store Front
http://www.cncguitarproducts.com/
KMG Guitar Kit Information
http://www.kennethmichaelguitars.com/ki ... ckage.html
http://www.kennethmichaelguitars.com/
Store Front
http://www.cncguitarproducts.com/
KMG Guitar Kit Information
http://www.kennethmichaelguitars.com/ki ... ckage.html
-
John Parchem
- Posts: 2749
- Joined: Fri Dec 23, 2011 8:33 pm
- Location: Seattle
- Contact:
Re: Martin 00 12 Fret - cutaway with arm bevel #12
Sorry I have been traveling (sailing in the Grenadines :)), so it has been a bit since I have posted.
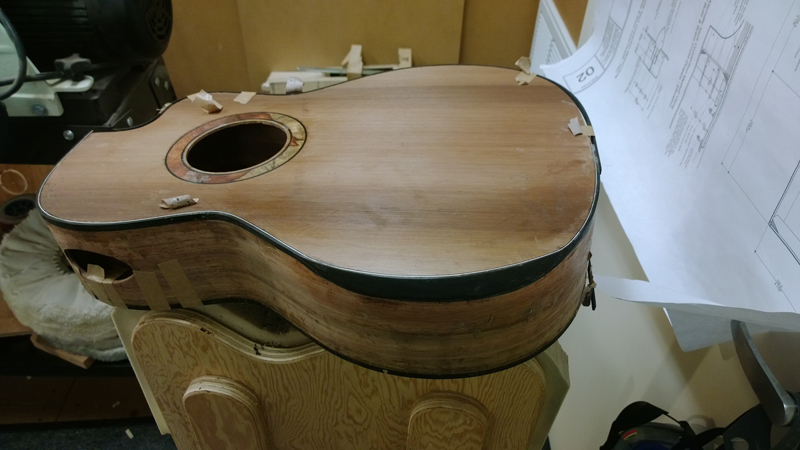
Here is the completion of the bevel.
I used rasps, sand paper and a scrapper to shape the bevel. Here it is really important to get the edges of the bevel next to the top purfling and the rims sanded straight like in the diagram in my previous post. (do not ask me how I know this or how many tried it took before I learned it.) There is a danger of rounding over the edge of the bevel on top. This will be bad as you will remove the veneer when scraping it level to the top.
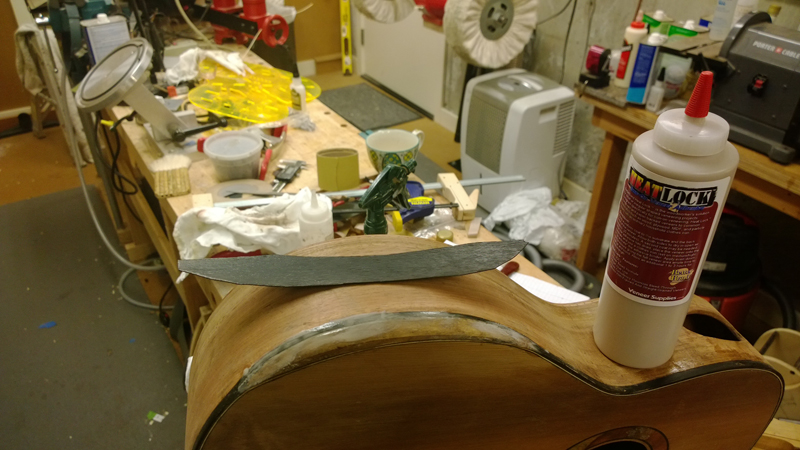
You can loosely cut the veneer, I used a veneer heat set glue to coat each surface and let it dry. Many other types of glue will work.
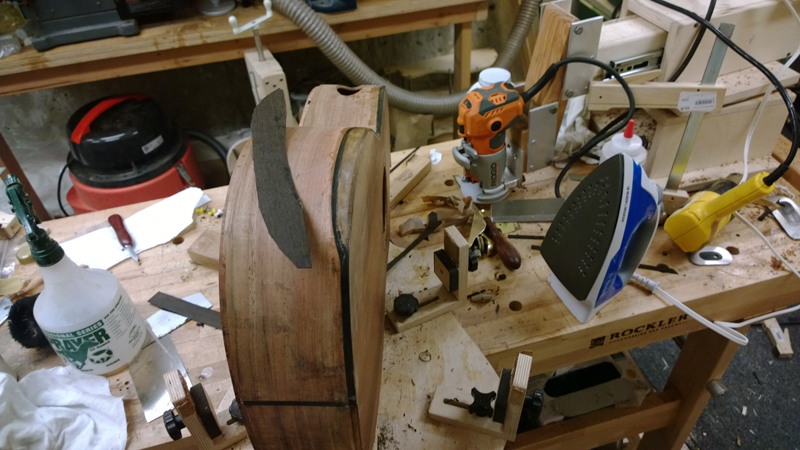
I used an iron to set the veneer to the bevel. After a couple of hours I hit the edge of the bond all around with CA to really lock the edge.
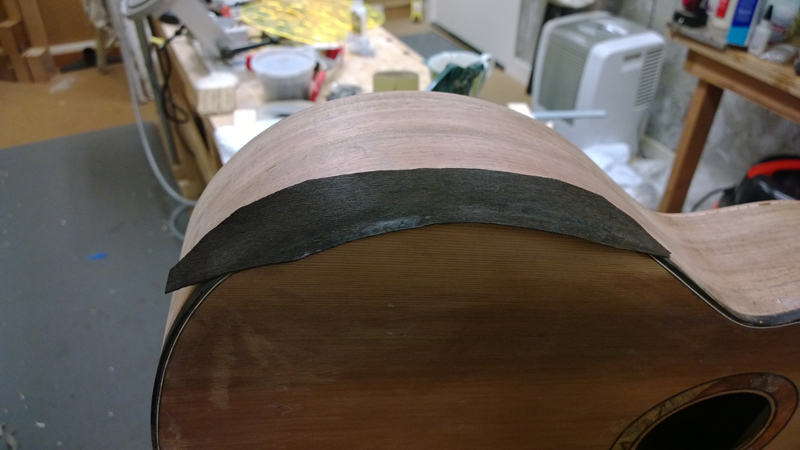
I used a sharp scrapper flush with the top and flush the rims to trim the veneer. (look for the diagram in my previous post to see how the veneer will be trimmed.
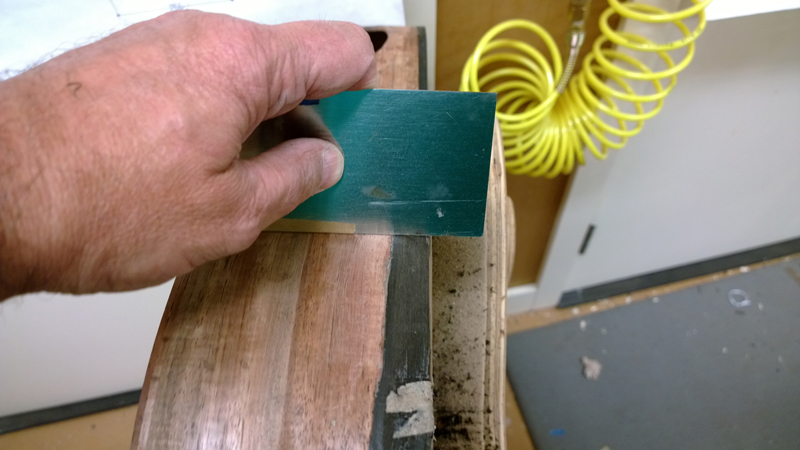
Easy as pie! (not really. There was a bit of learning, but with a heat sensitive glue and a large sheet of veneer I got to try it a few times to get it right.
Here is the completion of the bevel.
I used rasps, sand paper and a scrapper to shape the bevel. Here it is really important to get the edges of the bevel next to the top purfling and the rims sanded straight like in the diagram in my previous post. (do not ask me how I know this or how many tried it took before I learned it.) There is a danger of rounding over the edge of the bevel on top. This will be bad as you will remove the veneer when scraping it level to the top.
You can loosely cut the veneer, I used a veneer heat set glue to coat each surface and let it dry. Many other types of glue will work.
I used an iron to set the veneer to the bevel. After a couple of hours I hit the edge of the bond all around with CA to really lock the edge.
I used a sharp scrapper flush with the top and flush the rims to trim the veneer. (look for the diagram in my previous post to see how the veneer will be trimmed.
Easy as pie! (not really. There was a bit of learning, but with a heat sensitive glue and a large sheet of veneer I got to try it a few times to get it right.